5 Easy Ways to Modernize Your Outdated Home
Whether you’ve recently moved into an older house or your current home is starting to show its age, modernizing your living space can breathe new life into your surroundings.
I’ll guide you through five simple and effective ways to update your home without breaking the bank. From quick paint jobs to floor refinishing, these tips will help you transform your outdated space into a fresh, modern haven.
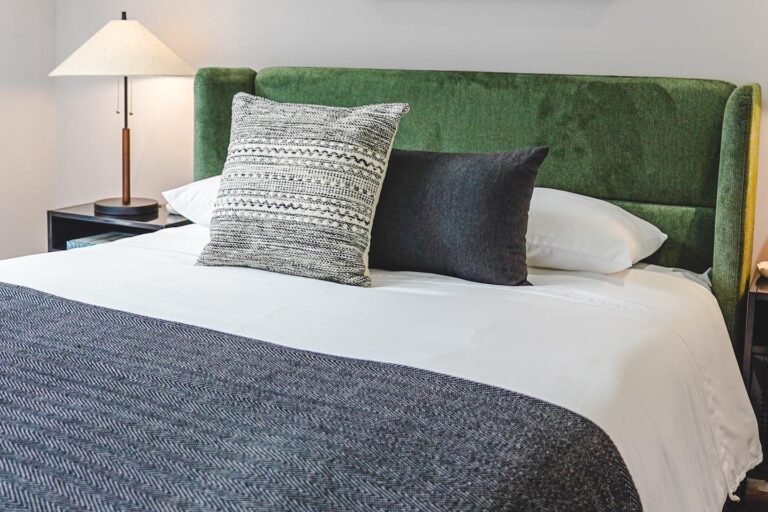
Paint old light fixtures
One of the quickest and most cost-effective ways to modernize your home is by updating your light fixtures. Instead of replacing them entirely, consider giving them a fresh coat of paint. This simple upgrade can dramatically change the look of a room, making it feel brighter and more spacious.
To begin, thoroughly clean the light fixture to ensure the paint will adhere properly. Remove any dust, grime, or oil that may have accumulated over time. Once clean, you may need to apply a coat of primer, especially if you’re making a significant color change or working with a glossy surface. This extra step will improve paint adhesion and provide a better final result.
Next, choose a paint color that complements your décor. For a vintage look, try using metallic paint on older fixtures. If you prefer a more modern aesthetic, opt for matte black or white finishes. Apply the paint in thin, even coats, allowing each layer to dry completely before adding another. Typically, one to two coats should suffice, but this may vary depending on the color and type of paint you’re using.
For added durability, consider applying a clear sealer once the paint has fully dried. This will help prevent chipping and extend the life of your newly painted fixture. The entire process can usually be completed in a day or two, depending on drying times.
This DIY project is relatively inexpensive, with costs typically ranging from $20 to $50 for paint and supplies. If painting isn’t your style, an alternative approach is to replace just the shades on your existing fixtures. This can also provide a quick and easy update to your lighting without the need for painting.
By refreshing your light fixtures, you can significantly impact the overall look of a room without the expense of full replacement. It’s an excellent starting point for modernizing your home, offering a high impact for minimal effort and cost.
Repaint built-ins
Built-in shelving, cabinets, and other architectural features can add character to a home, but they can also date it if their finish is outdated. Repainting these built-ins is an excellent way to refresh your home’s interior without the expense and hassle of tearing out and replacing them.
Before you begin, carefully consider your color choice. While white is a popular option that can brighten a space and create a clean, modern look, don’t be afraid to explore other colors. A bold hue can turn your built-ins into a striking focal point, while a color that closely matches your walls can help the built-ins blend in and make the room feel larger.
Preparation is key to a successful paint job. Start by thoroughly cleaning the surfaces to remove any dust, grime, or oily residues. Next, lightly sand the surfaces to create a better surface for the paint to adhere to. If your built-ins have a glossy finish, you may need to use a deglosser or a stronger sanding to ensure the new paint will stick.
After preparing the surface, apply a high-quality primer. This step is crucial, especially if you’re making a significant color change or if the original finish is dark or richly stained. Allow the primer to dry completely before moving on to the paint.
When it comes to paint, opt for a durable, easy-to-clean finish like semi-gloss or satin. These finishes are ideal for built-ins as they can withstand occasional cleaning and are less likely to show fingerprints compared to matte finishes. Apply the paint in thin, even coats, using a brush for detailed areas and a small roller for larger, flat surfaces. Two to three coats are typically sufficient, but allow each coat to dry thoroughly before applying the next.
For a professional-looking finish, remove hardware like knobs and handles before painting. You can either clean and reinstall the original hardware or use this opportunity to update it with new pieces that complement your modernized look.
Repainting built-ins can be a bit time-consuming, but it’s a relatively inexpensive project that can dramatically update the look of your home. Expect to spend between $100 to $200 on supplies, depending on the size of your built-ins and the quality of paint you choose. The result will be a fresh, customized look that breathes new life into your living space and helps bring your home into the present day.
Repaint appliances
Updating your appliances can be one of the most impactful ways to modernize your kitchen, but it’s also often one of the most expensive. If your appliances are still functioning well but look outdated, repainting them can be a cost-effective alternative to replacement.
Before you begin, it’s crucial to determine if your appliances are suitable for painting. Most metal appliances can be painted successfully, but it’s best to avoid painting newer appliances that are still under warranty, as this could void your coverage. Additionally, read your appliance’s user manual to ensure that painting won’t interfere with its operation.
Preparation is key to a successful appliance painting project. Start by unplugging the appliance and thoroughly cleaning its surface. Use a degreaser to remove any built-up grime, especially in the kitchen where grease and food particles can accumulate. Once clean, lightly sand the surface to create a better bonding surface for the paint.
Choosing the right paint is crucial. Look for appliance epoxy paint or other paints specifically designed for use on metal surfaces. These paints are durable and can withstand the heat and frequent use that appliances endure. Avoid standard wall paint, as it won’t hold up to the demands placed on appliances.
When you’re ready to paint, work in a well-ventilated area. Apply the paint in thin, even coats using a foam roller for large, flat areas and a brush for corners and details. Most appliance paints require at least two coats for full coverage. Allow each coat to dry completely before applying the next, following the manufacturer’s instructions for drying times.
For best results, consider using spray paint designed for appliances. This can provide a smoother, more factory-like finish. If using spray paint, be sure to mask off any areas you don’t want painted, including handles, controls, and rubber seals.
Keep in mind that while painting can give your appliances a fresh look, it won’t change their underlying color. For example, painting a black refrigerator white may require several coats and still might not achieve the same look as a factory-white appliance.
The cost of repainting appliances can range from $50 to $150 per appliance, depending on the size and the type of paint used. While more involved than other painting projects, this update can significantly refresh your kitchen’s appearance without the high cost of new appliances, helping to modernize your home on a budget.
Paint the interior of your door
Often overlooked, interior doors can play a significant role in your home’s overall aesthetic. Painting these doors is a simple yet effective way to add character and modernize your living space without a major renovation.
Begin by choosing the right color for your doors. While white is a classic choice that can brighten up a space and complement almost any decor, don’t be afraid to experiment with bolder colors. A pop of color on your doors can create visual interest and serve as an accent to your overall color scheme. For a cohesive look, consider painting all interior doors the same color, or create contrast by painting them a shade darker or lighter than your walls.
Before painting, remove the door from its hinges if possible and lay it flat. This will make the painting process easier and help prevent drips. If you can’t remove the door, be sure to protect your floors and any nearby furniture with drop cloths.
Start by cleaning the door thoroughly to remove any dirt, oils, or residue. Next, lightly sand the surface to create a better bonding surface for the paint. If your door has a glossy finish, you may need to use a deglosser or sand more thoroughly.
Apply a coat of primer, especially if you’re making a dramatic color change or if the door has never been painted before. Once the primer is dry, begin painting with a semi-gloss or satin finish paint, which is durable and easy to clean. Use a foam roller for large, flat areas and a brush for any panels or details.
For the best results, remove all hardware before painting. This includes the doorknob, hinges, and any plates or locks. If you’re updating your door’s look, this is an excellent opportunity to replace old hardware with new, modern pieces.
If you want to add extra flair, consider painting the door frame a contrasting color or using painter’s tape to create geometric patterns or stripes on the door itself. For a truly unique look, you could even use wallpaper on your door instead of paint.
The cost of painting an interior door typically ranges from $20 to $50 per door, depending on the quality of paint and whether you need to purchase additional supplies. This affordable update can have a surprisingly significant impact on the look of your home, helping to tie together your decor and create a more modern, cohesive appearance throughout your living spaces.
Join our list and get tips on interior design.
Refinish hardwood floors
Hardwood floors are a timeless feature in many homes, but over time they can become scratched, dull, or outdated in color. Refinishing your hardwood floors is an excellent way to modernize your home while preserving and enhancing this valuable feature.
The process of refinishing hardwood floors involves sanding down the existing finish to bare wood, then applying a new stain (if desired) and a protective finish. This can dramatically change the look of your floors, allowing you to update the color to match current trends or your personal style.
Before you begin, assess the condition of your floors. If they have deep gouges, significant warping, or have been refinished multiple times already, you may need to consult a professional. However, if your floors are in generally good condition with surface-level wear, refinishing can be a viable DIY project for those with some home improvement experience.
Start by clearing the room completely and sealing it off from the rest of the house to contain dust. Rent a drum sander and edge sander from a home improvement store. Begin with coarse-grit sandpaper to remove the old finish and level the floor, then progress to finer grits for a smooth surface. Be sure to sand evenly to avoid creating dips or uneven areas.
After sanding, thoroughly vacuum and wipe down the floor to remove all dust. If you’re changing the color of your floors, now is the time to apply wood stain. Choose a stain that complements your home’s style – lighter stains can make a space feel more open and modern, while darker stains can add warmth and richness.
Once the stain is dry, apply a protective finish. Polyurethane is a popular choice for its durability and ease of application. Water-based polyurethanes dry quickly and have less odor, while oil-based options provide a slightly more durable finish but take longer to dry. Apply multiple thin coats for the best results, lightly sanding between coats for a smooth finish.
The cost of refinishing hardwood floors yourself can range from $500 to $1,000 for a medium-sized room, depending on the products you choose and any tool rentals. Professional refinishing typically costs $3 to $8 per square foot.
While refinishing hardwood floors is more time-consuming and labor-intensive than other modernization techniques, the results can be truly transformative. Fresh, gleaming hardwood floors can make your entire home feel updated and well-maintained, significantly increasing its appeal and value.
Remember that this project typically requires you to vacate the space for several days while the floors are being worked on and the finishes are drying. Plan accordingly and consider doing this project room by room if you can’t vacate your entire home at once.
By refinishing your hardwood floors, you’re not just modernizing your home – you’re also preserving and enhancing a valuable feature that will continue to add charm and value to your property for years to come.